POLLY'S KITCHEN GARDEN SCHOOL
  • Home
  • About
  • Courses
  • Philosophy
  • Seasonal Recipes & Blog
  • Contact
  • CONSULTANCY

Chilli Oil... Some Like It HOT!

24/11/2014

0 Comments

 
Chilli Oil

So Simple
So Scrumptious.

And quite frankly, I don't know what else I'm supposed to do with the bumper glut I've had this year!

Seriously; I may not need to EVER buy any chillies again!

But.. If you have a greenhouse, please, I URGE you - grow a chilli plant!  They are really low maintenance, past the seed sowing stage, and these days, there are lots of varieties available at garden centres... Though, be warned, my experience of buying them as plants is that they rarely turn out to be what they say on the tin!
Chilli Roulette!

Picture
Picture

What you need;

1.  Olive oil
Enough to fill whatever you plan to bottle it in. 
I use Extra Virgin because I like the flavour with the chilli, but use mild if you prefer the taste pure.

2. Chillies
(Per 200ml of Oil)
3-4 Dried Whole Hot Chillies
Half a teaspoon or so of dried chilli flakes.
(These are an optional extra, but does look nice in the bottle.
Kinda like a snow dome when you shake it..)

N.B. 
You can use semi-dried chillies, but in this case use the oil within a couple of months otherwise it'll start to go cloudy.
What you do;
  • Heat the oil gently in a pan on the stove for 5 mins.
  • Add chillies and flakes - they should sizzle just a little as they go in.  We don't wanna deep fry them!
  • Heat for another few mins then decant into sterilised bottles (use a funnel, for peats sake) reserving the chillies.
  • Using tongs, add the chillies to the bottle and if necessary top up the oil so they are fully submerged.

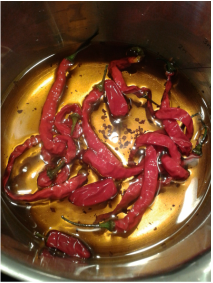
That's it!

The oil will get hotter over time, but should keep perfectly well for at least a year.
0 Comments

North African Spiced Squash Soup

22/11/2014

0 Comments

 
This 'any squash' soup recipe is an idea to play with and make your own.

For those tricky occasions when the family come to call.. And at this time of year, the chances are there'll be bearing some kind of peculiar-shaped squash or gourd from a Farmers Market...


Make a batch, freeze whatever you have left over in saved plastic takeaway tubs and you'll never be more than 10 minutes away from something really delicious and satisfying to eat.

         Ingredients & Method

  • Peel and cut into chunks any Winter Squash (Butternut, Acorn, etc.)
  • Put in a roasting tray with a good slug of Olive Oil and Warm Spices - Paprika (sweet and smoked) Cumin, Coriander (whole seed and ground) Cayennne or other chilli flakes, a touch of Allspice or Cinnamon if you like; whatever smells right.
  • Roast in a 180 C oven for anywhere between 25-50 mins, depending on the density and size of the chunks.
  • About 10 mins before you think its nice and soft, add a teaspoon or two of Harissa Paste to the tray and pop back in the oven. 
  • When done, remove the cooked squash to a large saucepan and add stock (chicken or vegetable) to the roasting tin with another teaspoon or two of harissa and 'mop up' all the nice caramelised flavour from the tin.
  • Add the stock, in stages, into the saucepan with the squash whilst using a stick blender, blitzing and tasting, until desired consistency is achieved.
  • As a finishing touch, add a little coconut, to taste. Keep a block of Coconut Cream in the fridge and grate it in - you can use it wherever you would coconut milk, it keeps for ages and it saves opening a tin!  Sweet!
  • Garnish with fresh Coriander Leaf. Yum!

................................ Make a meal out of it ...............................

1. By adding a Poached Egg - surprisingly good! Just sit atop the soup before serving..

2. By adding Chorizo; sliced or crumbled and quickly fried. Use the red paprika oil left in the pan to 'drizzle dress' the soup. Souper! 
Picture
Perfect for when a family of Gourds turn up....
Picture
Picture
Picture

0 Comments

Perfect COMPOST!

11/11/2014

0 Comments

 
Picture
Lovely Jubbly Compost

What to Compost and NOT! A few simple rules, plus some hints and tips.

Ingredients

From the garden; Everything except nasty perennial weeds and large branches.  
From the kitchen; All (uncooked) fruit and veg scraps; (except citrus) tea bags; coffee grounds; non glossy paper products.

Try not to let one material dominate the heap.  Like a cake mixture, you want a good mix of wet and dry; soft, green, nitrogen rich material and dry, brown, carbon rich material.  

Method

If you are starting from scratch, place more woody material at the bottom so it aerates the pile and has most weight and heat on top of it to help with the breaking down process.
Its obvious, but smaller pieces will break down far more quickly, so its worth chopping larger twiggy bits and tearing up newspapers etc.

Keep adding to it at regular intervals.  Once the bin is full, or the pile is high enough, leave it for a month or so, where it'll get nice and hot and start really breaking down.
After this initial stage, its good to get in there with a fork and give it a good mix up, If its dry, get a watering can and give it a good soaking.
The more regularly do this turning and mixing, the quicker you'll get your end result. Choose a nice cold winters morning and you'll have a good glow in your cheeks by the end.  Who needs the gym!
In ideal conditions (warm and damp) and with regular turning (once a month) you can have a lovely ready-to-use pile within 6 months.

Further Notes

With larger gardens, the ideal set up is to have 3 compost bins going.
  • The first bin, you use until full, then treat as described above.  
  • Whilst this is happening, you can begin filling BIN 2.  By the time BIN 2 is full, you'll probably have some usable compost in BIN 1.  This can now be used, or covered with a tarpaulin/old carpet until ready to be used.  
  • You now have compost ready, compost in the making, and a free bin for new waste.  As long as you use the compost in BIN 1 before BIN 3 is full, you can roll this cycle on, so you always have space for new rubbish, and ready to use compost, plus something in the middle.

0 Comments

Carrot & Walnut Loaf

10/11/2014

0 Comments

 
Easy peesy, dairy free Carrot and Walnut Loaf cake.  Moist, fragrant, perfectly scrumptious with cream cheese frosting.

Makes x 1 (9 inch) Loaf.

200g Soft Brown Sugar
2 eggs
200ml Sunflower Oil
200g Plain Flour
3/4 tsp Bicarb of Soda
3/4 tsp Baking Powder
1 tsp Ground Cinnamon 
1/2 tsp Ground Ginger
1/2 tsp Mixed Spice
1/2 tsp Salt
Few drops Vanilla Extract
200g Carrots
60g Chopped Walnuts (extra to decorate)

Loaf tin, buttered and base lined with greaseproof paper.

Oven at 170 (160 Fan)

Put the sugar, eggs and oil in a bowl and beat using a handheld electric whisk, until all ingredients are well incorporated.

Slowly add the flour, bicarb, baking powder, spices, vanilla and salt, beating as you go. (I swap to a handheld spatula before the end, as the mix gets thicker.)

Grate the carrots (I like a mix of sizes; about 2/3 fine to 1/3 coarse) and stir in by hand. Add the walnuts and stir a few times till evenly combined.

Pour into prepared loaf tin and bake for approx 50 mins till springy to touch.

When cold, cover with Cream Cheese Frosting and dust with cinnamon.  I like a little pathway of chopped walnuts down the middle of the cake, but decorate as you wish!  
EAT!  ENJOY!
Picture
Picture

To Make The Cream Cheese Frosting.

200g Icing Sugar
35g unsalted butter; at room temp
100g Cream Cheese (I use half full fat and half Light)

Beat the icing sugar and butter together using an electric whisk on med-slow speed (or by hand if you want to earn it!)
Keep going till they are well combined and look almost like very fine crumbs.

Add the cream cheese in one go and beat on med-high speed (or max arm strength!) until light and smooth.
Do Not overbeat as it can quickly become runny.

Refrigerate until ready to use.
Frosting can be applied the night before serving if you can keep the cake cool somewhere afterwards.
0 Comments

    Categories

    All
    Recipes
    What To Do Right Now

    Polly's Posts

    In addition to 
    What to Do Right Now, this is where you'll find the recipes for Seasonal Treats, plus other tasty ways to use your home grown produce.

    The Archives

    August 2019
    May 2017
    April 2017
    October 2016
    August 2016
    July 2016
    June 2016
    May 2016
    April 2016
    March 2016
    February 2016
    January 2016
    November 2015
    September 2015
    August 2015
    July 2015
    June 2015
    May 2015
    April 2015
    March 2015
    February 2015
    January 2015
    December 2014
    November 2014

    Categories

    All
    Recipes
    What To Do Right Now

    RSS Feed

Proudly powered by Weebly
Photos used under Creative Commons from joyosity, Infomastern, emlavieriscull, deamentiaemundi, deamentiaemundi, shawncampbell, Ruth and Dave, Bekathwia, sa_ku_ra, nociveglia, Christopher Craig, Deejay500, MizGingerSnaps, kathryn in stereo, plastAnka, BioDivLibrary, Elvert Barnes, dichohecho, caligula1995, Jeremy Jenum, joyosity, Tim Pierce, Veganbaking.net, richard_north, Peter O'Connor aka anemoneprojectors, nunymare, MizGingerSnaps, adrigu, olfiika, DanielaC173, Samantha Forsberg, BioDivLibrary, generalising, seelensturm, flowercarole, JeepersMedia, AJC1, phil wood photo, trekkyandy, DrPhotoMoto, flossyflotsam, Keira