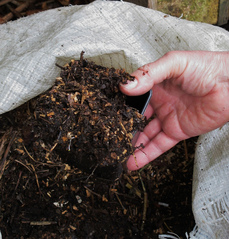
Lovely Jubbly Compost
What to Compost and NOT! A few simple rules, plus some hints and tips.
Ingredients
From the garden; Everything except nasty perennial weeds and large branches.
From the kitchen; All (uncooked) fruit and veg scraps; (except citrus) tea bags; coffee grounds; non glossy paper products.
Try not to let one material dominate the heap. Like a cake mixture, you want a good mix of wet and dry; soft, green, nitrogen rich material and dry, brown, carbon rich material.
Method
If you are starting from scratch, place more woody material at the bottom so it aerates the pile and has most weight and heat on top of it to help with the breaking down process.
Its obvious, but smaller pieces will break down far more quickly, so its worth chopping larger twiggy bits and tearing up newspapers etc.
Keep adding to it at regular intervals. Once the bin is full, or the pile is high enough, leave it for a month or so, where it'll get nice and hot and start really breaking down.
After this initial stage, its good to get in there with a fork and give it a good mix up, If its dry, get a watering can and give it a good soaking.
The more regularly do this turning and mixing, the quicker you'll get your end result. Choose a nice cold winters morning and you'll have a good glow in your cheeks by the end. Who needs the gym!
In ideal conditions (warm and damp) and with regular turning (once a month) you can have a lovely ready-to-use pile within 6 months.
Further Notes
With larger gardens, the ideal set up is to have 3 compost bins going.
- The first bin, you use until full, then treat as described above.
- Whilst this is happening, you can begin filling BIN 2. By the time BIN 2 is full, you'll probably have some usable compost in BIN 1. This can now be used, or covered with a tarpaulin/old carpet until ready to be used.
- You now have compost ready, compost in the making, and a free bin for new waste. As long as you use the compost in BIN 1 before BIN 3 is full, you can roll this cycle on, so you always have space for new rubbish, and ready to use compost, plus something in the middle.